Easy Amigurumi Santa Donut Ornament Free Pattern
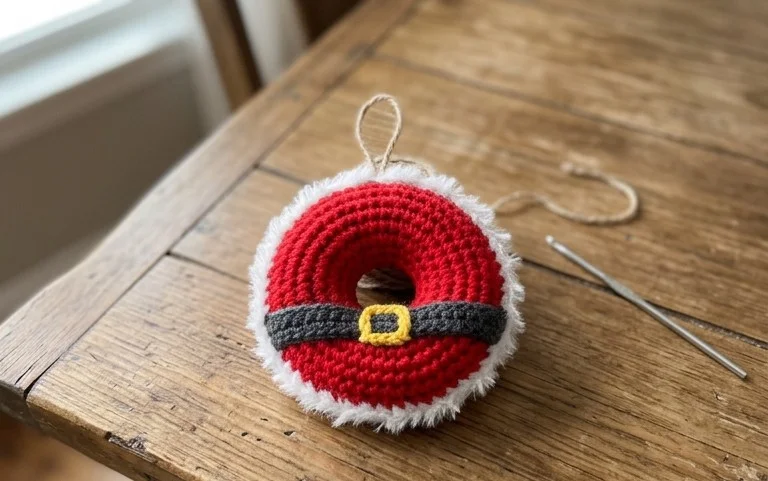
This festive little project brings the classic look of a holiday treat right to your Christmas tree with a soft, squishy texture that feels substantial in your hand. Designed for those who want quick results, this donut ornament features a charming Santa-inspired color scheme that adds warmth to any branch. You will work in a continuous spiral, using basic stitches to form the round shape before adding the signature belt detailing. It is a rewarding project for anyone building their collection of handmade decorations, offering a simple way to practice shaping while creating something cheerful to share with friends.
Why You’ll Love This Pattern
Crocheting a classic amigurumi ball is the foundational skill every fiber artist needs to master for three-dimensional work. This pattern uses a simple spherical construction that creates a perfect, dense fabric, which prevents stuffing from poking through gaps. It works up in under an hour, making it an ideal choice for using up small amounts of leftover yarn from larger projects. Because it relies on basic increases and decreases, the rhythm of the work is meditative and easy to memorize for those who prefer to crochet while listening to audiobooks or watching television.
I struggled with keeping my increases even until I tried this specific ball pattern. The shaping is very intuitive and it helped me understand how to build consistent spheres for my other soft toys.
— Sarah, beginner amigurumi enthusiast
Pattern Overview & Skill Level
- Skill Level: Beginner
- Approximate Time: 45–60 minutes
- Construction: Continuous rounds worked in a spiral, starting with a magic ring and utilizing invisible decreases for a clean finish
- Finished Dimensions: Approximately 3 inches in diameter when using worsted weight yarn
Materials & Supplies Needed
- Yarn: Worsted weight (#4) cotton or acrylic blend. Approximately 30 yards.
- Hook Size: 3.75 mm (F-5) to ensure a tight tension that keeps fiberfill secure.
- Notions: Polyester fiberfill stuffing, stitch markers, yarn needle, and scissors.
- Safe yarn substitutions: You may use DK weight yarn with a 3.0 mm hook for a smaller, 2-inch ball. Using a heavier yarn like bulky weight will increase the size significantly and require more stuffing.
Stitch Guide & Abbreviations (US Terms)
- MR: Magic ring (a way to start rounds by crocheting over an adjustable loop)
- ch: Chain
- st(s): Stitch(es)
- sc: Single crochet
- inc: Increase (work 2 sc in the same stitch)
- dec: Decrease (invisible decrease: insert hook into the front loops of the next two stitches, yarn over, pull through both, yarn over, pull through remaining two loops on hook)
- sl st: Slip stitch
Step-by-Step Pattern Instructions
Main Sphere Body
Work in continuous spirals without joining rounds. Use a stitch marker to track the first stitch of every round.
- Rnd 1: Start 6 sc in a MR (6 sts)
- Rnd 2: Inc in each st around (12 sts)
- Rnd 3: Sc 1, inc in next st around (18 sts)
- Rnd 4: Sc 2, inc in next st around (24 sts)
- Rnd 5: Sc 3, inc in next st around (30 sts)
- Rnds 6–10: Sc in each st around (30 sts)
- Rnd 11: Sc 3, dec in next st around (24 sts)
- Rnd 12: Sc 2, dec in next st around (18 sts)
- Rnd 13: Sc 1, dec in next st around (12 sts)
Finishing and Closing
At this point, fill the sphere firmly with polyester fiberfill. Continue to close the remaining hole.
- Rnd 14: Dec around (6 sts)
- Fasten off, leaving a 6-inch tail.
- Thread the tail onto a yarn needle. Weave the needle through the front loops of the remaining 6 stitches and pull tight to close the opening.
- Secure the end by knotting it near the base and threading the yarn tail back into the center of the ball to hide it.
Care & Washing Instructions
- Machine wash on a gentle cycle in cold water using a mesh laundry bag to protect the shape.
- Lay the ball flat on a towel in a well-ventilated area to air dry completely.
- If the ball loses its shape over time, gently roll it between your palms to redistribute the internal fiberfill.
Pro Tips & Common Mistakes to Avoid
Maintain tight tension throughout your project. If you find your stitches have large gaps, go down one hook size to prevent stuffing from showing. Always place a locking stitch marker in the first stitch of every new round to avoid losing your place, especially during the decrease rounds. When weaving in your yarn end, pass the needle through the center of the ball several times in different directions to ensure the tail stays buried inside. You can increase the size of this project by adding more rounds of increases (e.g., Sc 4, inc), but keep in mind that larger sizes require more stuffing to maintain a firm, round shape.
Frequently Asked Questions
Can I use a different yarn weight for this pattern?
Yes, you can use any weight yarn as long as you match it with a hook size that creates a tight fabric. If you see light through your stitches, your hook is too large for the yarn thickness.
Is this project suitable for absolute beginners?
This is an excellent project for beginners because it introduces basic shaping techniques like increasing and decreasing without requiring complicated color changes or complex stitch patterns.
How do I keep my edges from curling?
Curling usually occurs if your tension is too loose or your stitches are uneven. Focus on pulling your yarn consistently after every single crochet to ensure the fabric remains stiff and uniform.
Can I sell the items made from this pattern?
Yes, you are welcome to sell finished items you create. Please check the specific terms of use provided by the pattern designer, as most require credit to be given in your product listings.
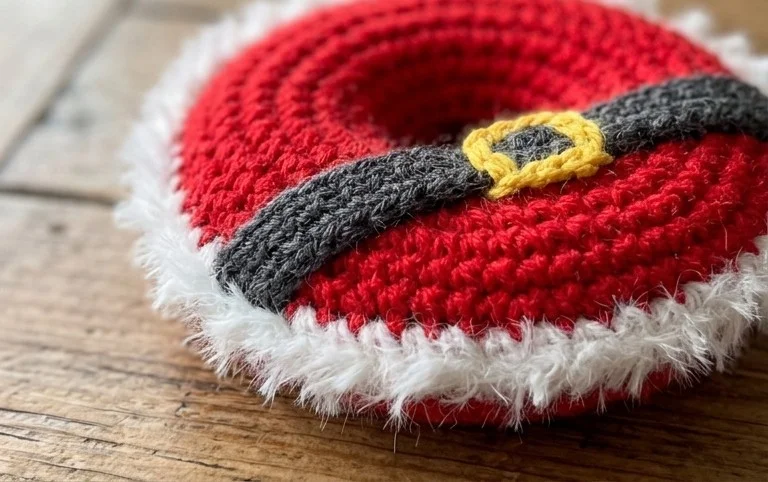
Your finished ornament will hang beautifully among your traditional baubles, adding a unique handmade touch to your holiday decorations this season. You can easily modify the size by switching to a bulky weight yarn and a larger hook if you prefer a oversized donut for your mantle. I would love to see how your Santa donut turns out, so please share your photos with the community on Instagram or Facebook. Head over to our main library to find more free projects for your holiday crafting collection.