Heart Snowman Ornament Free Pattern: Easy Step-by-Step
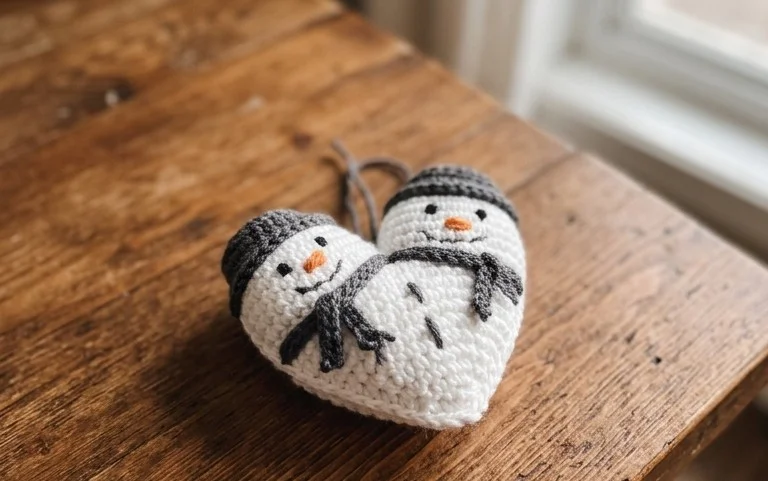
A soft layer of polyester stuffing gives this ornament its rounded, huggable shape that sits comfortably in your palm. This small decoration combines the classic look of a winter snowman with a sweet heart motif, making it a thoughtful gift for friends or a charming addition to your holiday tree. Beginners will appreciate how the continuous round construction removes the need for joining rows, while those with more experience can enjoy a meditative project that comes together over a quiet weekend. You will master basic increases and decreases to build this 3D character, turning simple yarn into a durable, festive ornament.
Why Crocheters Love It
This beginner-friendly project works up quickly, making it a reliable choice when you need a handmade gift in a single afternoon. Because it uses a small amount of yarn, it is an excellent way to use up leftovers from larger blankets or garment projects. The pattern relies on basic stitches that create a dense, professional fabric without requiring complex techniques. You will find the rhythm of the work both calming and repetitive enough to master while watching a favorite show.
I finished this project in just three hours and the instructions were clear enough that I did not have to restart once. It was a great way to use up my scrap yarn stash.
— Sarah, hobbyist crocheter
Pattern Overview & Skill Level
- Skill Level: Beginner
- Approximate Time: 3 to 4 hours
- Construction: Working in continuous rounds with increasing and decreasing stitches to create a 3D structure
- Finished Dimensions: Approximately 6 inches tall and 4 inches wide
Materials & Supplies Needed
- Yarn: Worsted weight (#4), 100% acrylic, approximately 80 yards in main color and 10 yards in contrast color.
- Hook Size: 4.0 mm (US G-6).
- Notions: Tapestry needle, stitch markers, polyester fiberfill stuffing, and a pair of 9mm safety eyes.
- Yarn Substitutions: Cotton yarn works well for a stiffer, more defined structure but may require a slightly larger hook to maintain comfortable tension. Avoid fuzzy mohair blends, as they hide stitch definition and make it difficult to locate the correct loops for increases.
Stitch Guide & Abbreviations (US Terms)
- MR: Magic Ring.
- ch: Chain.
- sc: Single crochet.
- inc: Increase (work 2 sc in the same stitch).
- dec: Decrease (sc2tog, work 2 stitches together through front loops).
- sl st: Slip stitch.
- st(s): Stitch(es).
- BLO: Back Loop Only.
Step-by-Step Pattern Instructions
Body
- Rnd 1: Start 6 sc in a MR (6 sts).
- Rnd 2: Inc in each st around (12 sts).
- Rnd 3: (1 sc, inc) repeat 6 times (18 sts).
- Rnd 4: (2 sc, inc) repeat 6 times (24 sts).
- Rnd 5: (3 sc, inc) repeat 6 times (30 sts).
- Rnds 6–12: Sc in each st around (30 sts).
- Rnd 13: (3 sc, dec) repeat 6 times (24 sts).
- Rnd 14: (2 sc, dec) repeat 6 times (18 sts). Insert safety eyes between Rnds 9 and 10, spaced 4 stitches apart. Begin stuffing firmly with fiberfill.
- Rnd 15: (1 sc, dec) repeat 6 times (12 sts).
- Rnd 16: Dec 6 times (6 sts).
Finishing
Cut the yarn leaving a 6-inch tail. Use the tapestry needle to weave the tail through the front loops of the remaining 6 stitches and pull tight to close the opening. Weave the end securely into the center of the piece and trim the excess yarn.
Care & Washing Instructions
- Hand wash in cool water using a gentle liquid detergent to maintain the shape of the fiberfill.
- Lay the piece flat on a clean towel and roll it to press out excess moisture, then let it air dry completely.
- Do not iron or bleach, as these processes can melt synthetic fibers and distort the crochet stitches.
Pro Tips & Common Mistakes to Avoid
- Maintain consistent tension by holding your yarn with a steady grip, ensuring the gaps between stitches remain closed so the stuffing does not show through.
- Always place a stitch marker in the first stitch of every round to keep track of your position, as continuous rounds have no clear start or end point.
- Weave your ends in by passing the needle through the center of the stuffing rather than the surface stitches to keep the transition invisible.
- You can scale this project up by using a larger hook and bulkier yarn, though you will need approximately 25% more yardage for every half-millimeter increase in hook size.
Frequently Asked Questions
Can I use a different yarn weight for this pattern?
Yes, you can use any weight of yarn, but you must adjust your hook size to match. If you use a thinner yarn, use a smaller hook to prevent the stuffing from poking through the holes between stitches.
How do I keep my edges clean when decreasing?
Use the invisible decrease method by picking up only the front loops of the next two stitches. This creates a smoother surface that mimics the look of standard single crochet stitches.
Is this pattern suitable for complete beginners?
This pattern is ideal for those who have mastered the basic single crochet stitch and are ready to learn how to create shapes by increasing and decreasing in the round.
Am I allowed to sell items made from this pattern?
You may sell items you personally create with this pattern as long as you credit the designer. Always link back to the original source to help others find the instructions.
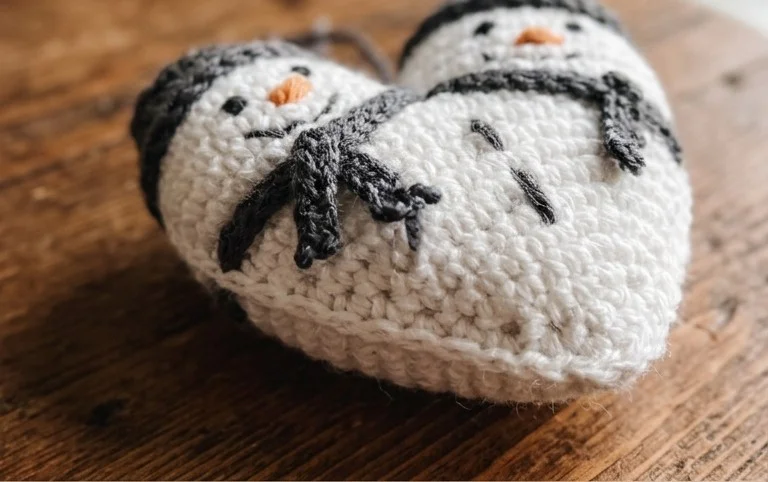
Your finished snowman feels sturdy and looks polished enough to gift to neighbors or keep as a personal keepsake. You might experiment with different ribbon colors for the scarf or use a metallic thread for a bit of extra sparkle on the heart. Sharing a photo of your work on your favorite social media site helps other makers find this project. Please browse the rest of the blog for more free patterns to fill your afternoon hours with creative, handmade joy.