Easy Star Amigurumi Free Pattern: Step-by-Step Guide
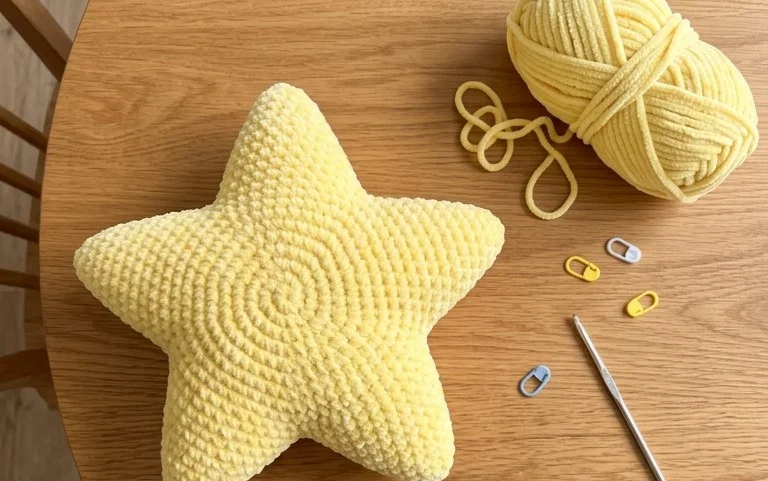
This miniature star brings a cheerful touch to any child’s bedroom or nursery shelf with its firm, rounded points and smooth cotton texture. The finished piece feels dense and substantial in your palm, making it a reliable companion for little hands to hold during play. Beginners find this project approachable because it relies on standard stitches that repeat across five identical segments. You will practice managing consistent tension and closing small openings, which are valuable skills for all future toy-making. Whether you need a handmade gift in a single afternoon or a stash-busting activity, this shape provides a rewarding result.
Why This Project Is Worth Making
This beginner-friendly project works up quickly, making it a satisfying choice for those who need a gift in an afternoon. Because the pattern uses minimal yardage, it is an effective way to clear out those leftover bits of yarn hiding in your stash. The repetitive nature of the single crochet stitches creates a dense, sturdy fabric that holds its shape well even after repeated use. By mastering the basic increases and decreases required here, you build the foundation necessary for more complex three-dimensional amigurumi projects.
I loved how fast this project came together. It was the perfect way to practice my stitch counting without feeling overwhelmed by a long pattern.
— Sarah, hobbyist crafter
Pattern Overview & Skill Level
- Skill Level: Beginner
- Approximate Time: 2 to 3 hours
- Construction: Amigurumi style, worked in continuous rounds
- Finished Dimensions: Approximately 4 inches tall
Materials & Supplies Needed
- Yarn: Worsted weight (#4), 100% cotton, approximately 30 yards. Cotton provides a crisp stitch definition that makes it easier to count your rounds.
- Hook Size: 3.5 mm (E-4)
- Notions: Tapestry needle for weaving ends, stitch marker, fiberfill stuffing, 6mm safety eyes.
- Yarn Substitutions: Acrylic worsted weight yarn is a safe alternative if you prefer a softer feel. Note that acrylic has more stretch, which may result in a slightly larger finished toy.
Stitch Guide & Abbreviations (US Terms)
- MR: Magic Ring. Used to create a tight, adjustable starting point for rounds.
- ch: Chain.
- sc: Single crochet.
- inc: Increase. Work 2 sc into the same stitch to add count.
- dec: Decrease (sc2tog). Insert hook into front loops of the next two stitches, yarn over, pull through both, yarn over and pull through remaining two loops.
- sl st: Slip stitch.
- st(s): Stitch(es).
Step-by-Step Pattern Instructions
Body
- Rnd 1: Start 6 sc in a MR (6 sts).
- Rnd 2: Inc in each st around (12 sts).
- Rnd 3: [1 sc, inc] 6 times (18 sts).
- Rnd 4: [2 sc, inc] 6 times (24 sts).
- Rnd 5: [3 sc, inc] 6 times (30 sts).
- Rnd 6-12: Sc in each st around (30 sts).
- Rnd 13: [3 sc, dec] 6 times (24 sts).
- Rnd 14: [2 sc, dec] 6 times (18 sts). Insert safety eyes between Rnd 9 and 10, spaced 5 stitches apart. Begin stuffing the body firmly.
- Rnd 15: [1 sc, dec] 6 times (12 sts).
- Rnd 16: Dec 6 times (6 sts). Fasten off and weave the tail through the front loops to close the opening.
Assembly
Use your tapestry needle to embroider a small nose or mouth feature using a short length of black embroidery floss. Ensure all yarn ends are pulled inside the body before completing the final closure. If you used stuffing, ensure the form is plump and symmetrical before tightening the final round.
Care & Washing Instructions
- Hand wash your finished item in cool water using a gentle detergent.
- Squeeze excess water out by pressing between towels rather than wringing to prevent deformation.
- Lay flat on a clean surface in the shade to dry completely.
Pro Tips & Common Mistakes to Avoid
Maintain consistent tension throughout the project to ensure the stuffing does not show through the gaps between your stitches. Using a stitch marker at the start of every round prevents you from losing your place, which is the most common reason for incorrect stitch counts in amigurumi. When weaving in your ends, run the needle through the inner fibers of the stitches to keep the join invisible and secure. If you wish to make the item larger, move up to a bulky weight yarn and a 5.0mm hook, but keep in mind that you will need approximately 50% more yarn to maintain the same proportions.
Frequently Asked Questions
Can I use a larger hook for this pattern?
Using a larger hook will result in a larger finished item with looser stitches. If you choose to do this, use a slightly heavier yarn weight to prevent the stuffing from being visible.
Is this project suitable for absolute beginners?
Yes, this pattern relies on the most fundamental amigurumi techniques. It is an excellent way to practice working in a round without complex stitch patterns.
How do I keep my stitch counts accurate?
Place a locking stitch marker in the first stitch of every round. Count your stitches at the end of every round before moving to the next set of instructions.
May I sell the items I make from this pattern?
You are welcome to sell finished products made from this pattern. I only ask that you credit the designer by including a link back to this page in your product description.
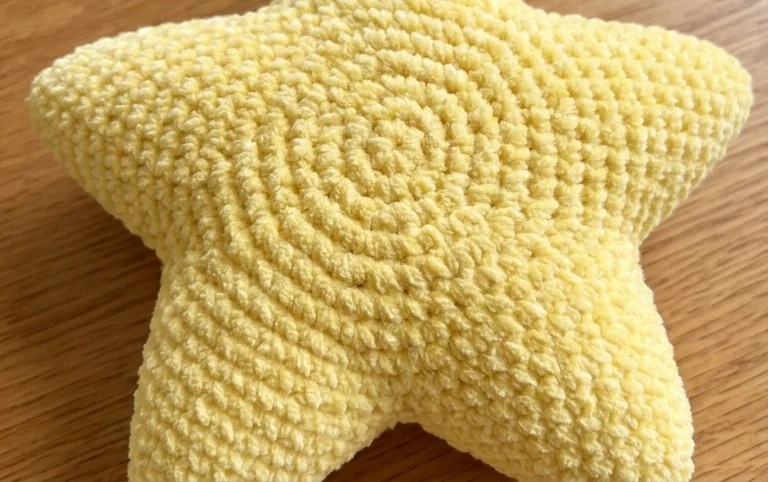
Seeing your handmade star come to life with just a bit of cotton yarn and a few stitches is a genuinely satisfying experience. You can easily experiment with the final look by using velvet yarn for an extra squishy texture or by adding a small rattle insert inside the stuffing for a sensory toy. Please share a photo of your finished work on social media so others can see your color choices. I invite you to browse through the rest of the blog for more free patterns to fill your afternoon.